

En el anterior Blog Post ya os conté cómo desplegar un VPS en el nuevo e increíble en precio servicio de Amazon Lightsail, en este Post vamos a ver la instalación de Zimbra Collaboration 8.7.1 sobre Ubuntu 16.04 LTS en Amazon Lightsail.
- Preparación del Sistema Operativo para Zimbra
- Instalación del servidor DNS
- Instalación de Zimbra ZCS 8.7.1
- ¿Qué hacer una vez instalado?
1.- Preparación del Sistema Operativo para Zimbra
El primer paso será configurar el fichero de hosts y hostname del VPS, a diferencia de las Instancias de Amazon EC2, aquí si podemos editar estos ficheros y los cambios son permanentes, ¡fantástico!
vi /etc/hosts
127.0.0.1 localhost
172.26.4.151 zimbratest.zimbra.io zimbratest

# The following lines are desirable for IPv6 capable hosts
::1 ip6-localhost ip6-loopback
fe00::0 ip6-localnet
ff00::0 ip6-mcastprefix
ff02::1 ip6-allnodes
ff02::2 ip6-allrouters
ff02::3 ip6-allhosts
Deberemos poner también el hostname
vi /etc/hostname
zimbratest
Y por último hacer un reboot:
reboot2.- Instalación del servidor DNS
Instalamos el servidor DNS dnsmasq, que es bastante sencillo y muy cómodo para laboratorios o pequeños entornos.
El primer comando que ejecutaremos será el de la instalación del paquete, donde haremos click en Y cuando pregunte:
root@zimbra87:/home/oper# apt-get install dnsmasq
Reading package lists... Done
Building dependency tree
Reading state information... Done
The following NEW packages will be installed:
  dnsmasq
0 upgraded, 1 newly installed, 0 to remove and 0 not upgraded.
Need to get 15.9 kB of archives.
After this operation, 71.7 kB of additional disk space will be used.
Get:1 http://us.archive.ubuntu.com/ubuntu xenial-updates/universe amd64 dnsmasq all 2.75-1ubuntu0.16.04.1 [15.9 kB]
Fetched 15.9 kB in 0s (40.1 kB/s)
Selecting previously unselected package dnsmasq.
(Reading database ... 91457 files and directories currently installed.)
Preparing to unpack .../dnsmasq_2.75-1ubuntu0.16.04.1_all.deb ...
Unpacking dnsmasq (2.75-1ubuntu0.16.04.1) ...
Processing triggers for systemd (229-4ubuntu6) ...
Processing triggers for ureadahead (0.100.0-19) ...
Setting up dnsmasq (2.75-1ubuntu0.16.04.1) ...
Processing triggers for systemd (229-4ubuntu6) ...
Processing triggers for ureadahead (0.100.0-19) ...
Editaremos ahora la configuración de dnsmasq para añadirle las entradas encesarias:
root@zimbra8:/home/oper# vi /etc/dnsmasq.conf
server=8.8.8.8
listen-address=127.0.0.1
domain=zimbra.io
mx-host=zimbra.io,zimbratest.zimbra.io,0
address=/zimbratest.zimbra.io/172.26.4.151
Una vez guardado el fichero, reiniciaremos el servicio de dnsmasq
root@zimbra8:/home/oper# service dnsmasq restart
* Restarting DNS forwarder and DHCP server dnsmasq
...done.
2.1.- Tests para comprobar DNS
Dos tests básicos que debemos hacer antes de instalar Zimbra Collaboration es comprobar que el MX resuelve bien, y también que nuestra entrada DNS de tipo A resuelve, lo podemos comprobar con la herramienta dig:
Comprobando el MX:
dig mx zimbra.io

; <<>> DiG 9.10.3-P4-Ubuntu <<>> mx zimbra.io
;; global options: +cmd
;; Got answer:
;; ->>HEADER< ;; flags: qr aa rd ra ad; QUERY: 1, ANSWER: 1, AUTHORITY: 0, ADDITIONAL: 2

;; OPT PSEUDOSECTION:
; EDNS: version: 0, flags:; udp: 1280
;; QUESTION SECTION:
;zimbra.io. IN MX

;; ANSWER SECTION:
zimbra.io. 0 IN MX 0 zimbratest.zimbra.io.

;; ADDITIONAL SECTION:
zimbratest.zimbra.io. 0 IN A 172.26.4.151

;; Query time: 0 msec
;; SERVER: 127.0.0.1#53(127.0.0.1)
;; WHEN: Thu Dec 01 10:35:23 UTC 2016
;; MSG SIZE rcvd: 90
Comprobando el Host A:
root@zimbratest:/home/ubuntu# dig a zimbratest.zimbra.io

; <<>> DiG 9.10.3-P4-Ubuntu <<>> a zimbratest.zimbra.io
;; global options: +cmd
;; Got answer:
;; ->>HEADER<] 273.13M 37.1MB/s in 6.1s
Podemos ver en la prueba anterior que lanzamos una consulta y nos devuelve un answer/respuesta y que el Server que se encarga de responder es 127.0.0.1, también valdría la IP local 172.26.4.151, si no tenéis estos resultados, por favor comprobar la configuración, o dejar un comentario para que os pueda ayudar.
3.- Instalación de Zimbra ZCS Open Source Edition 8.7.1 para Ubuntu 16.04 LTS
Ha llegado la hora de instalar el nuevo software de Zimbra, que podemos encontrar en el siguiente link.
Vamos a descargar la última versión de Zimbra Collaboration 8.7 para Ubuntu 16.04 LTS:
root@zimbra87:/home/oper# wget https://files.zimbra.com/downloads/8.7.1_GA/zcs-8.7.1_GA_1670.UBUNTU16_64.20161025045114.tgzProcedemos a descomprimir el fichero descargado:
root@zimbratest:/home/ubuntu# tar xzvf zcs-8.7.1_GA_1670.UBUNTU16_64.20161025045114.tgz
zcs-8.7.1_GA_1670.UBUNTU16_64.20161025045114/
zcs-8.7.1_GA_1670.UBUNTU16_64.20161025045114/packages/
zcs-8.7.1_GA_1670.UBUNTU16_64.20161025045114/packages/zimbra-apache_8.7.1.GA.1670.UBUNTU16.64_amd64.deb
zcs-8.7.1_GA_1670.UBUNTU16_64.20161025045114/packages/zimbra-core_8.7.1.GA.1670.UBUNTU16.64_amd64.deb
zcs-8.7.1_GA_1670.UBUNTU16_64.20161025045114/packages/zimbra-dnscache_8.7.1.GA.1670.UBUNTU16.64_amd64.deb
zcs-8.7.1_GA_1670.UBUNTU16_64.20161025045114/packages/zimbra-ldap_8.7.1.GA.1670.UBUNTU16.64_amd64.deb
zcs-8.7.1_GA_1670.UBUNTU16_64.20161025045114/packages/zimbra-logger_8.7.1.GA.1670.UBUNTU16.64_amd64.deb
zcs-8.7.1_GA_1670.UBUNTU16_64.20161025045114/packages/zimbra-mta_8.7.1.GA.1670.UBUNTU16.64_amd64.deb
zcs-8.7.1_GA_1670.UBUNTU16_64.20161025045114/packages/zimbra-proxy_8.7.1.GA.1670.UBUNTU16.64_amd64.deb
zcs-8.7.1_GA_1670.UBUNTU16_64.20161025045114/packages/zimbra-snmp_8.7.1.GA.1670.UBUNTU16.64_amd64.deb
zcs-8.7.1_GA_1670.UBUNTU16_64.20161025045114/packages/zimbra-spell_8.7.1.GA.1670.UBUNTU16.64_amd64.deb
zcs-8.7.1_GA_1670.UBUNTU16_64.20161025045114/packages/zimbra-store_8.7.1.GA.1670.UBUNTU16.64_amd64.deb
zcs-8.7.1_GA_1670.UBUNTU16_64.20161025045114/bin/
zcs-8.7.1_GA_1670.UBUNTU16_64.20161025045114/bin/get_plat_tag.sh
zcs-8.7.1_GA_1670.UBUNTU16_64.20161025045114/bin/zmValidateLdap.pl
zcs-8.7.1_GA_1670.UBUNTU16_64.20161025045114/bin/checkLicense.pl
zcs-8.7.1_GA_1670.UBUNTU16_64.20161025045114/bin/checkService.pl
zcs-8.7.1_GA_1670.UBUNTU16_64.20161025045114/bin/zmdbintegrityreport
zcs-8.7.1_GA_1670.UBUNTU16_64.20161025045114/data/
zcs-8.7.1_GA_1670.UBUNTU16_64.20161025045114/data/versions-init.sql
zcs-8.7.1_GA_1670.UBUNTU16_64.20161025045114/docs/
zcs-8.7.1_GA_1670.UBUNTU16_64.20161025045114/docs/YPL.txt
zcs-8.7.1_GA_1670.UBUNTU16_64.20161025045114/docs/zcl.txt
zcs-8.7.1_GA_1670.UBUNTU16_64.20161025045114/docs/zimbra_public_eula_2.6.txt
zcs-8.7.1_GA_1670.UBUNTU16_64.20161025045114/docs/en_US/
zcs-8.7.1_GA_1670.UBUNTU16_64.20161025045114/docs/en_US/admin.pdf
zcs-8.7.1_GA_1670.UBUNTU16_64.20161025045114/docs/en_US/Fedora Server Config.pdf
zcs-8.7.1_GA_1670.UBUNTU16_64.20161025045114/docs/en_US/Import_Wizard_Outlook.pdf
zcs-8.7.1_GA_1670.UBUNTU16_64.20161025045114/docs/en_US/Migration_Exch_Admin.pdf
zcs-8.7.1_GA_1670.UBUNTU16_64.20161025045114/docs/en_US/MigrationWizard_Domino.pdf
zcs-8.7.1_GA_1670.UBUNTU16_64.20161025045114/docs/en_US/MigrationWizard.pdf
zcs-8.7.1_GA_1670.UBUNTU16_64.20161025045114/docs/en_US/OSmultiserverinstall.pdf
zcs-8.7.1_GA_1670.UBUNTU16_64.20161025045114/docs/en_US/quick_start.pdf
zcs-8.7.1_GA_1670.UBUNTU16_64.20161025045114/docs/en_US/RNZCSO_2005Beta.pdf
zcs-8.7.1_GA_1670.UBUNTU16_64.20161025045114/docs/en_US/User Instructions for ZCS Import Wizard.pdf
zcs-8.7.1_GA_1670.UBUNTU16_64.20161025045114/docs/en_US/Zimbra iCalendar Migration Guide.pdf
zcs-8.7.1_GA_1670.UBUNTU16_64.20161025045114/docs/en_US/zimbra_user_guide.pdf
zcs-8.7.1_GA_1670.UBUNTU16_64.20161025045114/util/
zcs-8.7.1_GA_1670.UBUNTU16_64.20161025045114/util/modules/
zcs-8.7.1_GA_1670.UBUNTU16_64.20161025045114/util/modules/getconfig.sh
zcs-8.7.1_GA_1670.UBUNTU16_64.20161025045114/util/modules/packages.sh
zcs-8.7.1_GA_1670.UBUNTU16_64.20161025045114/util/modules/postinstall.sh
zcs-8.7.1_GA_1670.UBUNTU16_64.20161025045114/util/addUser.sh
zcs-8.7.1_GA_1670.UBUNTU16_64.20161025045114/util/globals.sh
zcs-8.7.1_GA_1670.UBUNTU16_64.20161025045114/util/utilfunc.sh
zcs-8.7.1_GA_1670.UBUNTU16_64.20161025045114/readme_source_en_US.txt
zcs-8.7.1_GA_1670.UBUNTU16_64.20161025045114/readme_binary_en_US.txt
zcs-8.7.1_GA_1670.UBUNTU16_64.20161025045114/install.sh
zcs-8.7.1_GA_1670.UBUNTU16_64.20161025045114/README.txt
Y nos moveremos al nuevo directorio
root@zimbratest:/home/ubuntu# cd zcs-8.7.1_GA_1670.UBUNTU16_64.20161025045114Y procedemos a instalar Zimbra:
root@zimbratest:/home/ubuntu/zcs-8.7.1_GA_1670.UBUNTU16_64.20161025045114# ./install.sh

Operations logged to /tmp/install.log.hCfQUbYY
Checking for existing installation...
zimbra-ldap...NOT FOUND
zimbra-logger...NOT FOUND
zimbra-mta...NOT FOUND
zimbra-dnscache...NOT FOUND
zimbra-snmp...NOT FOUND
zimbra-store...NOT FOUND
zimbra-apache...NOT FOUND
zimbra-spell...NOT FOUND
zimbra-convertd...NOT FOUND
zimbra-memcached...NOT FOUND
zimbra-proxy...NOT FOUND
zimbra-archiving...NOT FOUND
zimbra-core...NOT FOUND

----------------------------------------------------------------------
PLEASE READ THIS AGREEMENT CAREFULLY BEFORE USING THE SOFTWARE.
SYNACOR, INC. ("SYNACOR") WILL ONLY LICENSE THIS SOFTWARE TO YOU IF YOU
FIRST ACCEPT THE TERMS OF THIS AGREEMENT. BY DOWNLOADING OR INSTALLING
THE SOFTWARE, OR USING THE PRODUCT, YOU ARE CONSENTING TO BE BOUND BY
THIS AGREEMENT. IF YOU DO NOT AGREE TO ALL OF THE TERMS OF THIS
AGREEMENT, THEN DO NOT DOWNLOAD, INSTALL OR USE THE PRODUCT.

License Terms for this Zimbra Collaboration Suite Software:
https://www.zimbra.com/license/zimbra-public-eula-2-6.html
----------------------------------------------------------------------

Do you agree with the terms of the software license agreement? [N] y
Vamos a seleccionar “y” si aceptamos la EULA que nos indica en el enlace, además es importante destacar que Zimbra ha migrado a GPL v2.5, el siguiente paso comprobará los paquetes, y además nos preguntará si queremos usar el repositorio de paquetes de Zimbra, pulsaremos Y, ya os deje más información sobre esta nueva opción y cómo crear un repositorio local:
Checking for installable packages
Found zimbra-core
Found zimbra-ldap
Found zimbra-logger
Found zimbra-mta
Found zimbra-dnscache
Found zimbra-snmp
Found zimbra-store
Found zimbra-apache
Found zimbra-spell
Found zimbra-memcached
Found zimbra-proxy

Use Zimbra's package repository [Y]
Importing Zimbra GPG key
Configuring package repository
Esta parte es la más importante, vamos a instalar sólo los paquetes que describimos en el articulo, no necesitamos más, pulsaremos enter:
Select the packages to install

Install zimbra-ldap [Y]
Install zimbra-logger [Y]
Install zimbra-mta [Y]
Install zimbra-dnscache [Y] n
Install zimbra-snmp [Y]
Install zimbra-store [Y]
Install zimbra-apache [Y]
Install zimbra-spell [Y]
Install zimbra-memcached [Y]
Install zimbra-proxy [Y]
Checking required space for zimbra-core
Checking space for zimbra-store
Checking required packages for zimbra-store
zimbra-store package check complete.

Installing:
zimbra-core
zimbra-ldap
zimbra-logger
zimbra-mta
zimbra-snmp
zimbra-store
zimbra-apache
zimbra-spell
zimbra-memcached
zimbra-proxy
Presionaremos “y” para modificar el sistema:
The system will be modified. Continue? [N] y
Installing packages

zimbra-core will be downloaded.
zimbra-ldap will be downloaded.
zimbra-logger will be downloaded.
zimbra-mta will be downloaded.
zimbra-snmp will be downloaded.
zimbra-store will be downloaded.
zimbra-apache will be downloaded.
zimbra-spell will be downloaded.
zimbra-memcached will be downloaded.
zimbra-proxy will be downloaded.
Downloading packages. This will not modify the system. This may take some time.

Removing /opt/zimbra
Removing zimbra crontab entry...done.
Cleaning up zimbra init scripts...done.
Cleaning up /etc/security/limits.conf...done.

Finished removing Zimbra Collaboration Server.

Local packages zimbra-core zimbra-ldap zimbra-logger zimbra-mta zimbra-snmp zimbra-store zimbra-apache zimbra-spell zimbra-proxy selected for installation
Monitor /tmp/install.log.hCfQUbYY for package installation progress
Remote package installation started
Installing zimbra-core-components zimbra-ldap-components zimbra-mta-components zimbra-snmp-components zimbra-store-components zimbra-apache-components zimbra-spell-components zimbra-memcached zimbra-proxy-components....done
Local package installation started
Installing zimbra-core zimbra-ldap zimbra-logger zimbra-mta zimbra-snmp zimbra-store zimbra-apache zimbra-spell zimbra-proxy...done
done
Unescaped left brace in regex is deprecated, passed through in regex; marked by line 755.
Unescaped left brace in regex is deprecated, passed through in regex; marked by line 755.
Unescaped left brace in regex is deprecated, passed through in regex; marked by line 755.
Unescaped left brace in regex is deprecated, passed through in regex; marked by line 755.
Unescaped left brace in regex is deprecated, passed through in regex; marked by line 755.
Unescaped left brace in regex is deprecated, passed through in regex; marked by line 755.
Unescaped left brace in regex is deprecated, passed through in regex; marked by line 755.
Unescaped left brace in regex is deprecated, passed through in regex; marked by line 755.
Operations logged to /tmp/zmsetup.20161201-104042.log
Installing LDAP configuration database...done.
Setting defaults...
Ahora tendremos que cambiar el dominio por defecto, este paso es típico, y es también donde más se suele fallar:
DNS ERROR resolving MX for zimbratest.zimbra.io
It is suggested that the domain name have an MX record configured in DNS
Change domain name? [Yes]

Change domain name? [Yes] yes
Create domain: [zimbratest.zimbra.io] zimbra.io
MX: zimbratest.zimbra.io (172.26.4.151)

Interface: 172.26.4.151
Interface: 127.0.0.1
Interface: ::1
done.
Checking for port conflicts

Main menu
Vamos a cambiar la password de admin. Vamos a entrar en el menú 6 del principal y luego el submenú 4 para cambiar la password de administrador de zimbra:
Select, or 'r' for previous menu [r] 4Y escribimos la contraseña que queramos:
1) Common Configuration:
2) zimbra-ldap: Enabled
3) zimbra-logger: Enabled
4) zimbra-mta: Enabled
5) zimbra-snmp: Enabled
6) zimbra-store: Enabled
+Create Admin User: yes
+Admin user to create: [email protected]
******* +Admin Password UNSET
+Anti-virus quarantine user: [email protected]
+Enable automated spam training: yes
+Spam training user: [email protected]
+Non-spam(Ham) training user: [email protected]
+SMTP host: zimbratest.zimbra.io
+Web server HTTP port: 8080
+Web server HTTPS port: 8443
+Web server mode: https
+IMAP server port: 7143
+IMAP server SSL port: 7993
+POP server port: 7110
+POP server SSL port: 7995
+Use spell check server: yes
+Spell server URL: http://zimbratest.zimbra.io:7780/aspell.php
+Enable version update checks: TRUE
+Enable version update notifications: TRUE
+Version update notification email: [email protected]
+Version update source email: [email protected]
+Install mailstore (service webapp): yes
+Install UI (zimbra,zimbraAdmin webapps): yes

7) zimbra-spell: Enabled
8) zimbra-proxy: Enabled
9) Default Class of Service Configuration:
s) Save config to file
x) Expand menu
q) Quit

Address unconfigured (**) items (? - help)
Address unconfigured (**) items (? - help) 6

Store configuration

1) Status: Enabled
2) Create Admin User: yes
3) Admin user to create: [email protected]
** 4) Admin Password UNSET
5) Anti-virus quarantine user: [email protected]
6) Enable automated spam training: yes
7) Spam training user: [email protected]
8) Non-spam(Ham) training user: [email protected]
9) SMTP host: zimbratest.zimbra.io
10) Web server HTTP port: 8080
11) Web server HTTPS port: 8443
12) Web server mode: https
13) IMAP server port: 7143
14) IMAP server SSL port: 7993
15) POP server port: 7110
16) POP server SSL port: 7995
17) Use spell check server: yes
18) Spell server URL: http://zimbratest.zimbra.io:7780/aspell.php
19) Enable version update checks: TRUE
20) Enable version update notifications: TRUE
21) Version update notification email: [email protected]
22) Version update source email: [email protected]
23) Install mailstore (service webapp): yes
24) Install UI (zimbra,zimbraAdmin webapps): yes

Select, or 'r' for previous menu [r] 4

Password for [email protected] (min 6 characters): [Q3UQWRMLod] Zimbra2016

Store configuration

1) Status: Enabled
2) Create Admin User: yes
3) Admin user to create: [email protected]
4) Admin Password set
5) Anti-virus quarantine user: [email protected]
6) Enable automated spam training: yes
7) Spam training user: [email protected]
8) Non-spam(Ham) training user: [email protected]
9) SMTP host: zimbratest.zimbra.io
10) Web server HTTP port: 8080
11) Web server HTTPS port: 8443
12) Web server mode: https
13) IMAP server port: 7143
14) IMAP server SSL port: 7993
15) POP server port: 7110
16) POP server SSL port: 7995
17) Use spell check server: yes
18) Spell server URL: http://zimbratest.zimbra.io:7780/aspell.php
19) Enable version update checks: TRUE
20) Enable version update notifications: TRUE
21) Version update notification email: [email protected]
22) Version update source email: [email protected]
23) Install mailstore (service webapp): yes
24) Install UI (zimbra,zimbraAdmin webapps): yes
Vamos a pulsar enter para volver al menú principal:
Select, or 'r' for previous menu [r]

Main menu

1) Common Configuration:
2) zimbra-ldap: Enabled
3) zimbra-logger: Enabled
4) zimbra-mta: Enabled
5) zimbra-snmp: Enabled
6) zimbra-store: Enabled
7) zimbra-spell: Enabled
8) zimbra-proxy: Enabled
9) Default Class of Service Configuration:
s) Save config to file
x) Expand menu
q) Quit
Si presionamos a aplicaremos los cambios:
*** CONFIGURATION COMPLETE - press 'a' to applySelect from menu, or press ‘a’ to apply config (? – help) a
Pulsamos enter:
Save configuration data to a file? [Yes]
Save config in file: [/opt/zimbra/config.9375]
Saving config in /opt/zimbra/config.9375...done.
Pulsamos “y” para continuar:
The system will be modified - continue? [No] y
Operations logged to /tmp/zmsetup.20161201-104042.log
Setting local config values...done.
Initializing core config...Setting up CA...done.
Deploying CA to /opt/zimbra/conf/ca ...done.
Creating SSL zimbra-store certificate...done.
Creating new zimbra-ldap SSL certificate...done.
Creating new zimbra-mta SSL certificate...done.
Creating new zimbra-proxy SSL certificate...done.
Installing mailboxd SSL certificates...done.
Installing MTA SSL certificates...done.
Installing LDAP SSL certificate...done.
Installing Proxy SSL certificate...done.
Initializing ldap...done.
Setting replication password...done.
Setting Postfix password...done.
Setting amavis password...done.
Setting nginx password...done.
Setting BES searcher password...done.
Creating server entry for zimbratest.zimbra.io...done.
Setting Zimbra IP Mode...done.
Saving CA in ldap...done.
Saving SSL Certificate in ldap...done.
Setting spell check URL...done.
Setting service ports on zimbratest.zimbra.io...done.
Setting zimbraFeatureTasksEnabled=TRUE...done.
Setting zimbraFeatureBriefcasesEnabled=TRUE...done.
Checking current setting of zimbraReverseProxyAvailableLookupTargets
Querying LDAP for other mailstores
Searching LDAP for reverseProxyLookupTargets...done.
Adding zimbratest.zimbra.io to zimbraReverseProxyAvailableLookupTargets
Setting TimeZone Preference...done.
Initializing mta config...done.
Setting services on zimbratest.zimbra.io...done.
Adding zimbratest.zimbra.io to zimbraMailHostPool in default COS...done.
Creating domain zimbra.io...done.
Setting default domain name...done.
Creating domain zimbra.io...already exists.
Creating admin account [email protected].
Creating root alias...done.
Creating postmaster alias...done.
Creating user [email protected].
Creating user [email protected].
Creating user [email protected].
Setting spam training and Anti-virus quarantine accounts...done.
Initializing store sql database...done.
Setting zimbraSmtpHostname for zimbratest.zimbra.io...done.
Configuring SNMP...done.
Setting up syslog.conf...done.
Starting servers...done.
Installing common zimlets...
com_zimbra_clientuploader...done.
com_zimbra_mailarchive...done.
com_zimbra_tooltip...done.
com_zimbra_attachmail...done.
com_zimbra_proxy_config...done.
com_zimbra_cert_manager...done.
com_zimbra_date...done.
com_zimbra_url...done.
com_zimbra_webex...done.
com_zimbra_bulkprovision...done.
com_zimbra_attachcontacts...done.
com_zimbra_adminversioncheck...done.
com_zimbra_phone...done.
com_zimbra_email...done.
com_zimbra_srchhighlighter...done.
com_zimbra_ymemoticons...done.
com_zimbra_viewmail...done.
Finished installing common zimlets.
Restarting mailboxd...done.
Creating galsync account for default domain...done.

You have the option of notifying Zimbra of your installation.
This helps us to track the uptake of the Zimbra Collaboration Server.
The only information that will be transmitted is:
The VERSION of zcs installed (8.7.1_GA_1670_UBUNTU16_64)
The ADMIN EMAIL ADDRESS created ([email protected])

Notify Zimbra of your installation? [Yes] yes
Notifying Zimbra of installation via http://www.zimbra.com/cgi-bin/notify.cgi?VER=8.7.1_GA_1670_UBUNTU16_64&[email protected]

Notification complete
Setting up zimbra crontab...done.
Moving /tmp/zmsetup.20161201-104042.log to /opt/zimbra/log
Configuration complete - press return to exit
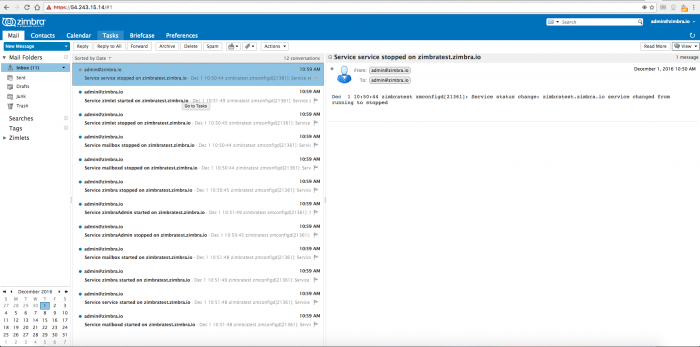
Ahora podremos añadir usuarios, vincular un LDAP existente, configurar puertos, etc a través de un navegador, sustiuir la IP por la vuestra:
Web Client
Admin Console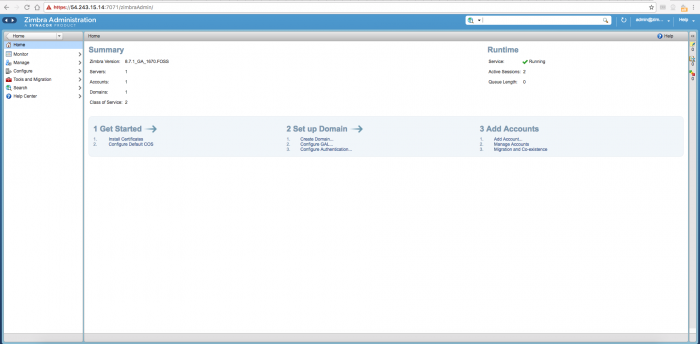
4.- ¿Qué hacer una vez instalado?
Una vez hemos terminado la instalación, aún quedan algunos pequeños puntos para depurar nuestra Infraestructura, os dejo aquí un Post que os ayudará en los siguientes pasos.
Espero que os guste el artículo y si pensáis que os puede servir a vosotros o a alguien que conozcáis, difundirlo 🙂
Estimado Jorge, gracias por este grandioso post, me ha sido inmensamente útil para comenzar mi experiencia con Zimbra en AWS, seguí todas tus instrucciones e instalé el aplicativo tal y como lo muestras utilizando mi propio dominio
Pero no recibo correos, cómo hago para configurar los registros MX a mi dominio (Uso Amazon Web Services, Route 53) para que me lleguen los correos, además quiero instalar un certificado SSL.
Saludos. Inmensamente agradecido
Saludos Mario,
Preparo un Blog para la semana que viene y lo ojeas.
Un saludo
Hola Jorge, instale el servidor y funciona bien, el problema es que cuando reinicio o apago el servidor, no inicia ningun servicio , tengo que iniciarlo a mano con el comando zmcontrol start, no se que puede ser, instale todo de 0 en otro disco y me hace los mismo, si lo arranco con el comando funciona, sld !
Saludos Jonatan,
Haz esto y reboot
update-rc.d -f zimbra removeupdate-rc.d zimbra start 99 2 5 . stop 01 0 1 6 .
Un saludo
Me da el siguiente error:
update-rc.d: warning: start and stop actions are no longer supported; falling back to defaults
update-rc.d: warning: start runlevel arguments (2 5) do not match zimbra Default-Start values (3 5)
insserv: Service nscd has to be enabled to start service zimbra
insserv: exiting now!
update-rc.d: error: insserv rejected the script header
Si perdona, estos son los pasos
systemctl enable nscdsystemctl enable zimbra
Y reboot
Funciono perfecto, una ultima consulta, tengo que ponerle ips publicas ya que tenemos ips fijas, deberia reemplazar las privadas por las publicas solamente ? donde figuran los dns de google, lo dejo asi ? sld !!
Saludos Jonatan,
Poner las IP publicas donde? En el Servidor DNS interno, es mejor dejar la IP privada, como se muestra en el Tutorial, para las DNS Publicas, debes poner la IP Publica claro, para que te lleguen los correos.
Un saludo
Buen dia Jorge,
si no es mucho pedir , podría hacer un tuto de zimbra pero en Google Cloud.
Gracias.
Hola jorge, voy a probar los pasos, pero me tope que no hay rhel o centos como sistema operativo. Hay alguna razón en especial de porque se usas Ubuntu en ves del propio sistema operativo de Amazon?
Saludos Miguel,
Zimbra no tiene version para el sistema operativo de Amazon, quiza se pueda instalar pero yo recomiendo Ubuntu, que si esta soportado
Jorge que tal. Hago todos los pasos, creo las dns desde lightsail apuntando el mx con la ip y un récord A tambien con la ip pública. Pero no funciona cuando quiero entrar al cliente web me sale como si no corriera el servidor. Por otro lado si entro al puerto 7080 me aparece el mensaje “it works”.
Saludos
Hola! como estan? me quedo la duda si Lightsail no bloquea el puerto 25 como EC2?
Hola Jorge! llegaste hacer el blog de como configurar los DNS para Amazon Lightsail? estoy buscando y no encuentro